 Call Technician

Gree AC Error Codes & Troubleshooting Guide [Error Finder Tool]
Find Gree AC error codes explained fast. Learn what each code means, common causes, and simple fixes to get your AC cooling again today.
Gree AC error codes appear on the indoor display or through LED blinks whenever the unit’s protection system detects a fault. These codes span several groups, including E1 to E9, F-series, H-series, L-series, P-series, and U-series codes. Each one points to a specific part of the system that needs attention.
Some codes signal simple issues you can check yourself, like a dirty filter, loose wiring, or a voltage problem. Others, such as compressor, IPM, or refrigerant leak codes, need a licensed technician. This guide gives you a quick-reference code table, causes and fixes for every code, a DIY safety checklist, and clear signs it’s time to call a professional like Urban Service Plaza.

Gree AC Error Code Finder
Type your error code below to see what it means and the quick fix to try.
Quick Answer – Gree AC Error Code Chart
Not sure what your Gree AC error code means? Use this quick-reference table to find your code and fix instantly.
Find your code below, then jump to the full explanation.
| Error Code | Meaning | Quick Fix |
|---|---|---|
| E1 | High-pressure protection | Clean condenser; check outdoor fan and airflow |
| E2 | Indoor anti-freezing protection | Clean filters; check refrigerant and blower |
| E3 | Low-pressure protection | Check for refrigerant leak; recharge if needed |
| E4 | Compressor exhaust high temperature | Clean condenser; check refrigerant and airflow |
| E5 | Overcurrent protection | Check supply voltage; use stabilizer if unstable |
| E6 | Communication error | Inspect wiring; tighten terminals |
| E8 | High temperature protection | Improve ventilation; check sensors and PCB |
| E9 | Water-full protection | Check drain pump/float switch; clear blockage |
| EE | EEPROM/main PCB fault | Restart unit; replace PCB if error persists |
| EH | Thermal relay error | Check compressor overload relay and wiring |
| F0 | Refrigerant leakage protection | Leak test; repair and recharge refrigerant |
| F1 | Indoor ambient sensor error | Check sensor wiring; measure resistance |
| F2 | Indoor tube (evaporator) sensor error | Verify sensor placement; replace if faulty |
| F3 | Outdoor ambient sensor error | Inspect wiring; replace sensor if required |
| F4 | Outdoor tube sensor error | Check wiring; replace sensor or PCB |
| F5 | Exhaust temperature sensor error | Check wiring; measure resistance |
| F6 | Overload limit frequency | Check compressor load; inspect inverter PCB |
| F7 | Outdoor tube-exit sensor error | Check sensor wiring; replace if faulty |
| F8 | Frequency reduction due to overload | Inspect load, refrigerant, and airflow |
| F9 | Exhaust temp sensor 2 error (digital) | Check sensor wiring; measure resistance |
| FA | Oil temp sensor 1 error (fixed-frequency) | Check sensor wiring; replace if faulty |
| FB | Oil temp sensor 2 error (digital) | Check sensor wiring; replace if faulty |
| FC | High-pressure valve error | Inspect valve and refrigerant pressure |
| FD | Low-pressure valve error | Inspect valve and refrigerant pressure |
| H0 | Heating defrost mode | Normal operation; no repair needed |
| H3 | Compressor overload protection | Check compressor current and refrigerant charge |
| H4 | System abnormality | Inspect sensors, PCB, compressor, refrigerant |
| H5 | IPM protection | Check inverter PCB and IPM cooling |
| H6 | Indoor fan motor error | Rotate blower; check wiring and motor |
| H7 | Compressor desynchronization | Inspect compressor, inverter module, wiring |
| HC | Power factor correction protection | Inspect power supply and PFC circuit |
| L3 | Outdoor fan motor error | Rotate fan; check wiring and motor resistance |
| L9 | Overpower protection | Check compressor load and power supply |
| LC | Compressor startup failure | Check compressor windings and inverter PCB |
| LD | Compressor phase loss protection | Inspect compressor wiring and inverter output |
| LE | Compressor stall/mechanical jam | Inspect terminals; replace compressor if seized |
| PL | DC bus low voltage protection | Check incoming voltage and rectifier circuit |
| PH | DC bus high voltage protection | Measure supply voltage; inspect inverter PCB |
| P5 | Phase current protection | Check compressor current and inverter module |
| P7 | Heat sink sensor error | Measure resistance; replace sensor if faulty |
| P8 | IPM module overtemperature | Clean unit; check cooling airflow |
| U1 | Compressor phase current circuit error | Inspect current sensing circuit and PCB |
| U3 | DC bus voltage drop | Check input voltage and DC bus capacitors |
| U5 | Unit current detection error | Inspect current sensor and inverter PCB |
| U7 | Four-way valve abnormality | Inspect valve coil and wiring |

Hire Our Expert Gree AC Technician in Kolkata Without Advance Charges
How to Read the Gree AC Error Code Display?
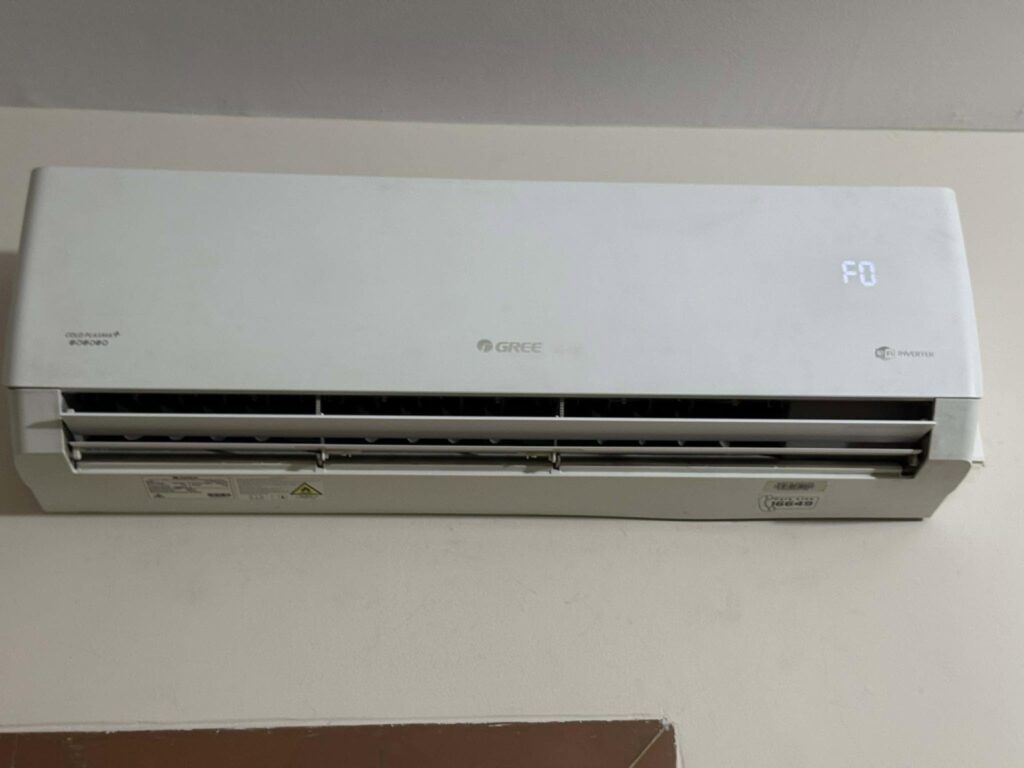
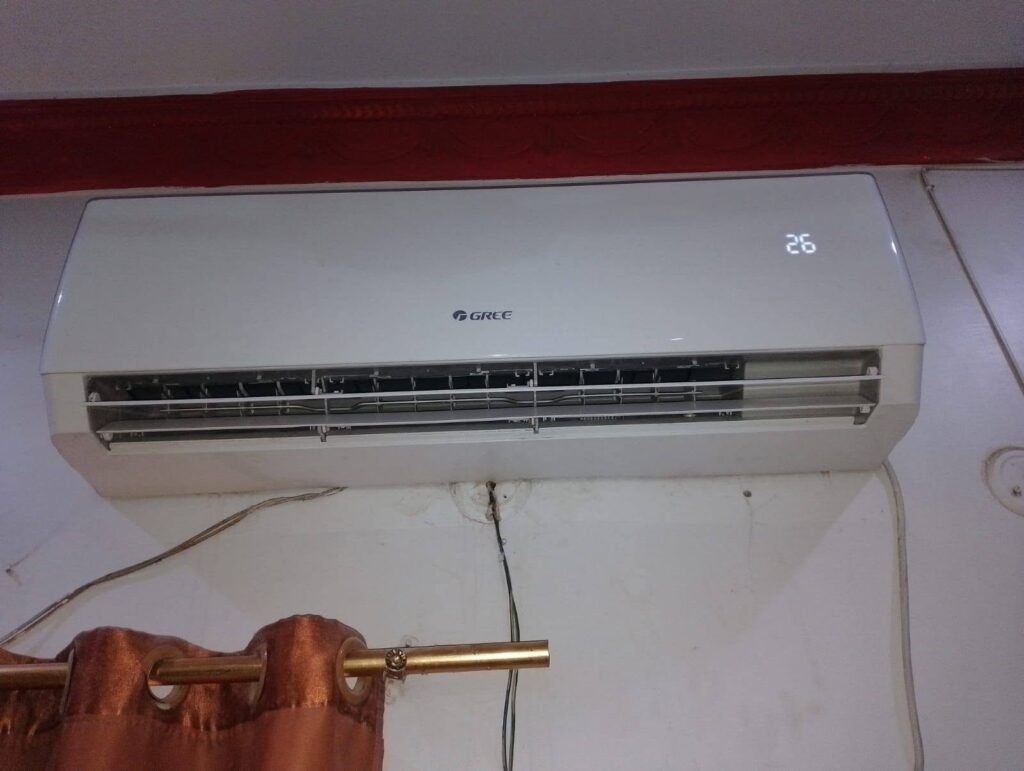
Gree ACs show faults in two ways. Most models display a direct alphanumeric code, like E1, F2, or H6, on the indoor unit’s screen. Some outdoor units instead use blinking LED patterns to signal the same faults.
Before you diagnose any code:
If you are not confident anough for fixing the Gree AC errors by yourself, immidiately contact Urban Service Plaza, the best Gree AC service centre in Kolkata & nearby areas for out of warranty AC. No advance booking charges & 15 days service guarantee.
First Thing to Try for Any Error Code?
Before digging into a specific code, try these quick steps. They solve many common faults without any tools or technical knowledge, and only take a few minutes.
- Note the displayed error code before switching off the unit.
- Turn off the AC and disconnect power for 5–10 minutes, then restart it.
- Check if the error clears. If not, inspect wiring harnesses and connectors for looseness, damage, or corrosion.
- Clear dust and debris from the indoor and outdoor units, since overheating can trigger several protection codes.
Caution: Only handle visual inspection and power resets yourself. Leave sensor testing, PCB work, and refrigerant handling to a licensed technician.
Gree AC Error Codes Explained With Solutions
E-Series Error Codes
E1 – High Pressure Protection
Meaning: This code appears when refrigerant pressure in the system rises too high.
Possible Causes:
- Overcharged refrigerant puts extra strain on the system.
- A dirty condenser coil blocks heat release.
- Outdoor fan malfunction or blocked airflow stops proper cooling of the refrigerant.
- High ambient temperature makes the condenser work harder than normal.
Troubleshooting:
- Check refrigerant pressure using gauges to confirm the fault.
- Clean the condenser coil if it’s dirty and blocking airflow.
- Verify the outdoor fan is spinning and working correctly.
- Remove any airflow restrictions around the outdoor unit.
- Recover excess refrigerant if the system is overcharged.
E2 – Indoor Anti-Freezing Protection
Meaning: The indoor evaporator temperature drops too low, so the system triggers this code to prevent ice buildup.
Possible Causes:
- A dirty air filter restricts airflow across the evaporator.
- Low airflow or low refrigerant reduces heat exchange.
- An indoor fan problem slows air movement over the coil.
Troubleshooting:
- Clean or replace air filters to restore normal airflow.
- Check the indoor blower for proper operation.
- Inspect refrigerant charge and top up if low.
- Verify the evaporator sensor is reading correctly.
E3 – Low Pressure Protection
Meaning: Refrigerant pressure has dropped too low, often pointing to a leak somewhere in the system.
Possible Causes:
- A refrigerant leak reduces overall pressure.
- A blocked capillary tube or expansion device restricts flow.
- Low refrigerant charge from the start also triggers this code.
Troubleshooting:
- Check operating pressures with gauges to confirm low pressure.
- Locate and repair any leaks in the refrigerant lines.
- Recharge refrigerant to the manufacturer’s specified amount.
Refrigerant leak repair and recharging should only be done by a certified technician. Contact Urban Service Plaza’s expert technician for affordable gas leakage inspection and AC gas refilling service in Kolkata & nearby areas.
E4 – Compressor Exhaust High Temperature
Meaning: The compressor’s discharge temperature has risen above a safe limit.
Possible Causes:
- Low refrigerant reduces the cooling effect inside the compressor.
- A dirty condenser or poor airflow traps heat in the system.
- A faulty exhaust temperature sensor can also trigger a false reading.
Troubleshooting:
- Clean the condenser to improve heat exchange.
- Check refrigerant charge and correct if needed.
- Inspect the exhaust sensor for damage or wear.
- Ensure the outdoor fan is running correctly to cool the unit.
E5 – Overcurrent Protection
Meaning: Compressor or system current has exceeded safe operating limits.
Possible Causes:
- High or low input voltage puts stress on the compressor.
- Compressor overload from mechanical strain increases current draw.
- An electrical fault elsewhere in the system can also cause this.
Troubleshooting:
- Measure supply voltage to check for instability.
- Use a voltage stabilizer if power fluctuates often.
- Check compressor current against rated values.
- Inspect the inverter PCB for faults.
E6 – Communication Error
Meaning: The indoor and outdoor units have lost communication with each other.
Possible Causes:
- A broken communication wire interrupts the signal.
- Loose terminal connections cause intermittent contact.
- PCB failure on either unit can also block communication.
Troubleshooting:
- Inspect communication wiring for breaks or damage.
- Tighten all terminal connections.
- Test both indoor and outdoor PCBs to rule out failure.
E8 – High Temperature Protection
Meaning: This code signals that high temperature resistance protection has activated to protect the system from heat damage.
Troubleshooting:
- Improve ventilation around the unit to reduce heat buildup.
- Check cooling airflow for blockages.
- Inspect sensors and the PCB for faults if the issue continues.
EE – EEPROM/Main PCB Fault
Meaning: This code points to an EEPROM memory failure or a general PCB malfunction.
Troubleshooting:
- Restart the unit first, since this sometimes clears the fault.
- Replace or repair the main PCB if the error keeps returning.
For low cost AC PCB repair service in Kolkata call us at +91 9831 015 086
F-Series Error Codes
F0 – Refrigerant Leakage Protection
Meaning: The system has detected refrigerant leakage or entered a related protection mode.
Troubleshooting:
- Leak test the refrigeration system to find the source.
- Repair any leaks found during testing.
- Recharge refrigerant correctly once the leak is fixed.
Refrigerant recharge work should only be handled by a licensed technician, since it involves pressurized gas and specialized tools.
F1 – Indoor Ambient Temperature Sensor Error
Meaning: The indoor ambient temperature sensor is not reading correctly.
Possible Causes:
- A loose sensor loses proper contact with the circuit.
- Damaged wiring interrupts the signal.
- A faulty sensor or indoor PCB failure can also cause this.
Troubleshooting:
- Check sensor placement to confirm it’s seated correctly.
- Inspect the connector for damage or looseness.
- Measure sensor resistance and compare it to spec.
- Replace the sensor if it tests faulty, or replace the indoor PCB if the sensor tests fine but the error remains.
F2 – Indoor Tube (Evaporator) Sensor Error
Meaning: The sensor monitoring the indoor evaporator tube is malfunctioning.
Possible Causes:
- The sensor may be disconnected from its socket.
- A faulty sensor or indoor PCB failure can also trigger this code.
Troubleshooting:
- Verify the sensor’s placement on the evaporator tube.
- Check the wiring for damage or looseness.
- Measure resistance to confirm sensor condition.
- Replace the sensor or PCB as needed.
F3 – Outdoor Ambient Temperature Sensor Error
Meaning: The outdoor ambient temperature sensor is giving an incorrect reading.
Possible Causes:
- A faulty ambient sensor fails to read temperature accurately.
- Wiring damage or an outdoor PCB fault can also be the cause.
Troubleshooting:
- Check sensor mounting to confirm it’s secure.
- Inspect wiring for cuts or corrosion.
- Measure resistance and compare to manufacturer specs.
- Replace the sensor or outdoor PCB if required.
F4 – Outdoor Tube Sensor Error
Meaning: The sensor on the outdoor condenser tube is malfunctioning.
Possible Causes:
- A faulty condenser pipe sensor gives an incorrect reading.
- A wiring fault or outdoor PCB fault can also trigger this.
Troubleshooting:
- Inspect the sensor for damage or poor contact.
- Check wiring for breaks.
- Measure resistance to confirm the fault.
- Replace the sensor or PCB if necessary.
F5 – Exhaust Temperature Sensor Error
Meaning: This code points to a fault with the exhaust temperature sensor. The source material doesn’t list separate causes for this code.
Troubleshooting:
- Check sensor wiring for damage or loose connections.
- Measure resistance to test the sensor.
- Replace the sensor if it tests faulty.
F6 – Overload Limit Frequency
Meaning: The compressor’s frequency is limited to protect the system from overload.
Troubleshooting:
- Check compressor load to see if it’s running beyond normal limits.
- Verify operating conditions like ambient temperature and airflow.
- Inspect the inverter PCB for faults.
F8 – Frequency Reduction Due to Overload
Meaning: The compressor’s speed is reduced automatically to prevent overload damage.
Troubleshooting:
- Inspect the overall system load.
- Check refrigerant charge levels.
- Verify airflow is not restricted at the indoor or outdoor unit.
Other F-Series Codes (F7, F9, FA, FB, FC, FD) – Brief Reference
A few F-series codes appear only in Gree’s summary chart without detailed causes or fixes listed. These include F7 (outdoor tube-exit sensor error), F9 (exhaust temperature sensor 2 error, digital models), FA and FB (oil temperature sensor 1 and 2 errors), and FC and FD (high and low-pressure valve errors). As general guidance, check wiring and measure resistance first, and only replace the specific sensor or valve after testing confirms it’s faulty. Since FC and FD involve pressure valves, it’s best to get these diagnosed by a professional technician.
H-Series Error Codes
H0 – Heating Defrost Mode (Not a Fault)
This code simply means the unit is running its normal heating defrost cycle. It’s not a fault and needs no repair.
H3 – Compressor Overload Protection
Meaning: The compressor has triggered overload protection.
Troubleshooting:
- Check compressor current against rated specifications.
- Verify refrigerant charge is correct.
- Inspect the condenser and airflow for blockages.
H4 – System Abnormality
Meaning: This is a general protection mode that activates when the system detects an unspecified fault.
Troubleshooting:
- Inspect sensors, PCB, compressor, and the refrigerant system to identify the root cause.
H5 – IPM (Inverter Power Module) Protection
Meaning: The inverter power module has triggered its protection function.
Troubleshooting:
- Check the inverter PCB for faults.
- Verify compressor current is within normal range.
- Inspect cooling of the IPM module.
H6 – Indoor Fan Motor Error
Meaning: The indoor fan motor is not operating correctly.
Possible Causes:
- The fan motor may be seized and unable to spin.
- A loose connector or faulty motor can also cause this.
- Indoor PCB failure is another possible cause.
Troubleshooting:
- Rotate the blower manually to check for resistance.
- Check wiring connections to the motor.
- Measure motor resistance against spec.
- Replace the motor or indoor PCB if faulty.
H7 – Compressor Desynchronization
Meaning: The compressor has lost synchronization with the inverter drive.
Troubleshooting:
- Inspect the compressor for mechanical issues.
- Check the inverter module for faults.
- Verify all wiring connections are secure.
HC – Power Factor Correction Protection
Meaning: The power factor correction circuit has triggered a protection response.
Troubleshooting:
- Inspect the power supply for irregularities.
- Check the PFC circuit and inverter PCB for faults.
L-Series Error Codes
L3 – Outdoor Fan Motor Error
Meaning: The outdoor fan motor is not working as expected.
Possible Causes:
- The fan motor may be seized.
- A wiring fault or outdoor PCB failure can also trigger this.
Troubleshooting:
- Rotate the fan manually to check for resistance.
- Check wiring for damage.
- Measure motor resistance to confirm the fault.
- Replace the motor or outdoor PCB if faulty.
L9 – Overpower Protection
Meaning: The system has triggered protection due to excess power draw.
Troubleshooting:
- Check compressor load for signs of overwork.
- Verify power supply is stable.
- Inspect the inverter PCB for faults.
LC – Compressor Startup Failure
Meaning: The compressor failed to start correctly.
Troubleshooting:
- Check compressor windings for continuity.
- Verify the inverter PCB is functioning properly.
- Inspect the power supply for stability.
LD – Compressor Phase Loss Protection
Meaning: The system has detected a missing phase in the compressor’s power supply.
Troubleshooting:
- Inspect compressor wiring for loose or missing connections.
- Check inverter output across all phases.
- Test compressor windings for continuity.
LE – Compressor Stall / Mechanical Jam
Meaning: The compressor has stalled or jammed mechanically.
Possible Causes:
- A locked compressor can’t turn freely.
- Burnt terminals or mechanical failure inside the compressor are common causes.
- Outdoor PCB failure can also be responsible.
Troubleshooting:
- Inspect compressor terminals for burn marks.
- Check winding continuity with a multimeter.
- Check for a ground fault in the compressor.
- Measure PCB output to rule out electrical faults.
- Replace the compressor if it’s mechanically seized.
This is one of the more serious Gree error codes. Compressor replacement should always be handled by a trained technician.
P-Series Error Codes
PL – DC Bus Low Voltage Protection
Meaning: The inverter’s DC bus voltage has dropped below the safe threshold.
Troubleshooting:
- Check incoming voltage for drops or instability.
- Inspect the inverter PCB for faults.
- Verify the rectifier circuit is working correctly.
PH – DC Bus High Voltage Protection
Meaning: The inverter’s DC bus voltage has risen above the safe threshold.
Troubleshooting:
- Measure supply voltage to check for spikes.
- Inspect the inverter PCB for damage.
- Verify overall power quality.
P5 – Phase Current Protection
Meaning: Current in one of the compressor’s phases has exceeded safe limits.
Troubleshooting:
- Check compressor current against rated values.
- Inspect the inverter module for faults.
- Test compressor windings for continuity.
P7 – Heat Sink Sensor Error
Meaning: The sensor monitoring the inverter’s heat sink is malfunctioning.
Troubleshooting:
- Check the heat sink sensor for damage.
- Measure resistance to confirm the fault.
- Replace the sensor if it tests faulty.
P8 – IPM Module Overtemperature
Meaning: The inverter power module has overheated.
Troubleshooting:
- Clean the outdoor unit to improve airflow.
- Check cooling airflow around the module.
- Inspect the IPM module and its thermal compound for wear.
U-Series Error Codes
U1 – Compressor Phase Current Detection Circuit Error
Meaning: The circuit that detects compressor phase current is malfunctioning.
Troubleshooting:
- Inspect the current sensing circuit for faults.
- Check the inverter PCB for related issues.
U3 – DC Bus Voltage Drop
Meaning: The inverter’s DC bus voltage has dropped unexpectedly.
Troubleshooting:
- Check input voltage for stability.
- Inspect DC bus capacitors for wear or failure.
- Test the inverter PCB for faults.
U5 – Unit Current Detection Error
Meaning: The system’s current detection circuit is not reading correctly.
Troubleshooting:
- Inspect the current sensor for damage.
- Check the inverter PCB for related faults.
U7 – Four-Way Valve Abnormality
Meaning: The four-way valve, which switches between cooling and heating modes, is not working correctly.
Troubleshooting:
- Inspect the four-way valve coil for damage.
- Check wiring connections to the valve.
When to Call a Professional AC Technician?
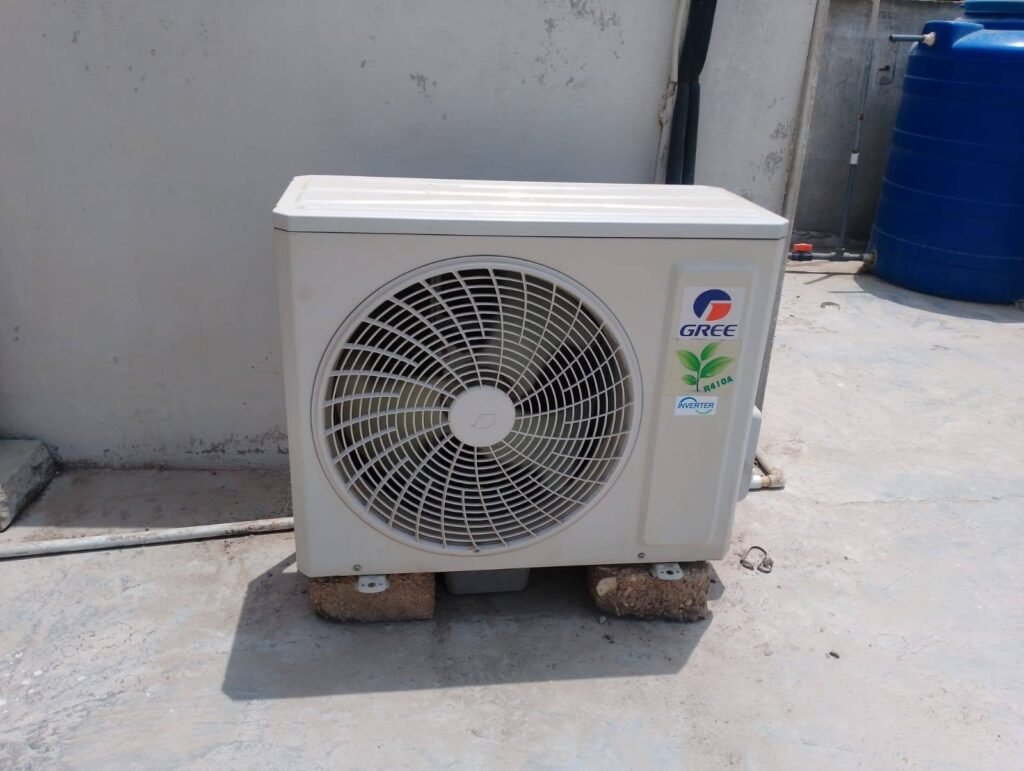
Some Gree error codes are not safe or practical to fix on your own. Watch out for these red flags:
If you spot any of these signs, it’s time to call in an expert. Urban Service Plaza offers doorstep AC repair across Kolkata, backed by ISO 9001:2015 certification. They service all AC brands, even if your unit is out of warranty or your AMC has expired.
Let’s Wrap Up
Most Gree AC error codes trace back to a handful of common issues: faulty sensors, loose wiring, unstable voltage, or blocked airflow and refrigerant problems. A simple power restart clears many of these faults on the spot. However, codes tied to the compressor, IPM module, or refrigerant leaks need a trained technician’s attention.
Understanding Gree AC error codes helps you decide when a quick fix is enough and when to call for help. If your error code persists after these basic checks, book a technician with Urban Service Plaza for reliable, doorstep AC repair.


