 Call Technician

Find Hitachi AC Error Codes & Fix Issues [Error Finder]
Find your Hitachi AC error code fast using error finder tool. Use our quick-lookup table to know the cause, fix it yourself, or know when to call a technician.
A blinking light or error code on your Hitachi AC is not random. It is the unit’s way of telling you something inside has gone wrong. This happens often on Hitachi inverter split ACs, which use sensors and circuit boards to monitor performance. Understanding Hitachi AC error codes helps you catch problems early, before they turn into bigger repairs.
The good news is that most codes point to a specific, identifiable cause. It could be a faulty sensor, loose wiring, low refrigerant, or a PCB fault. This guide explains how to read the blink pattern, gives you a full error code table with causes and fixes, shares DIY-safe checks you can try, and tells you exactly when it is time to call a professional.

Hitachi AC Error Code Finder
Type your error code below to see what it means and the quick fix to try.
TL;DR
Hitachi ACs signal problems through blinking LEDs. Indoor units flash in blink-count patterns, while outdoor units use their own blink codes. Newer or wired models may also show numeric or alphanumeric codes like P01 to P16, 031, S05, 206, 307, and 091.
Most Common Hitachi AC Errors
| Blink Pattern | Meaning | Quick Fix |
|---|---|---|
| 1 Blink | Refrigerant or gas-related fault | Check refrigerant charge and look for leaks |
| 2 Blinks | Peak current protection (compressor overload) | Check compressor current and outdoor PCB |
| 3 Blinks | Indoor-outdoor communication error | Inspect communication wiring and connectors |
| 4 Blinks | Compressor or switching circuit failure | Check compressor, inverter module, and power PCB |
| 5 Blinks | Room temperature sensor fault | Check sensor resistance and wiring, replace if faulty |
| 6 Blinks | High discharge temperature or compressor overheating | Check refrigerant level, service valves, and condenser |
| 7 Blinks | Indoor coil (evaporator) sensor fault | Check coil sensor and wiring, replace thermistor if faulty |
| 9 Blinks | Communication or outdoor fan/thermistor fault | Check F cable and outdoor fan wiring |
| 10 Blinks | Abnormal power source | Check AC input voltage and communication wiring |
| 11 Blinks | Outdoor fan stopped by strong reverse wind | No action needed, restarts automatically |
| 12 Blinks | Outdoor DC fan motor lock | Remove obstruction, check fan motor and controller |
| 13 Blinks | EEPROM/outdoor PCB memory error | Replace outdoor PCB |
| 14 Blinks | DC bus voltage abnormal | Check power supply and compressor, may need PCB replacement |
| 15 Blinks | Outdoor circuit/controller defective | Inspect and replace outdoor controller if needed |
| 16 Blinks | High load stop | Clean filters, remove obstructions, check service valve |
Hitachi outdoor unit LED blink codes
The outdoor PCB uses its own set of blink codes, which differ slightly from the indoor unit codes above.
| Blink Count | Likely Cause | Quick Fix |
|---|---|---|
| 5 Blinks | Outdoor PCB overload protector activated | Check compressor load, outdoor PCB, and cooling system |
| 6 Blinks | High discharge temperature thermistor fault | Check discharge temperature sensor and refrigerant system |
| 12 Blinks | DC outdoor fan motor failure | Check fan motor, fan driver, wiring, and PCB |
| 13 Blinks | Outdoor PCB software or EEPROM error | Replace the outdoor PCB if required |
| 15 Blinks | Outdoor controller failure | Inspect and replace the controller if defective |
Hitachi P-Series and alphanumeric error codes
Newer Hitachi models with digital displays or wired remotes show error codes as letters and numbers instead of blinking LEDs.
| Error Code | Meaning | Quick Fix |
|---|---|---|
| P01 | High inverter current | Check compressor load and inverter module, call a technician |
| P02 | High inverter current protection | Check compressor current draw and outdoor PCB |
| P04 | Inverter heat sink or inverter temperature too high | Clean condenser, check outdoor airflow and cooling |
| P05 | Discharge gas temperature too high | Check refrigerant charge, look for circuit restrictions |
| P06 | Low-pressure protection | Check refrigerant level, call technician if leak suspected |
| P09 | High-pressure protection | Check condenser, airflow, and refrigerant pressure |
| P10 | Current control protection | Check compressor current and outdoor PCB control circuit |
| P11 | Low-pressure abnormal | Check refrigerant charge and low-pressure sensor circuit |
| P12 | High-pressure abnormal | Check condenser airflow and high-pressure sensor circuit |
| P13 | High-pressure protection | Check refrigerant pressure, condenser, and outdoor airflow |
| P14 | Compressor overcurrent | Check compressor winding resistance and operating current |
| P15 | Discharge gas temperature high with low-pressure abnormal | Check refrigerant charge and discharge temperature sensor |
| P16 | Discharge gas superheat abnormal | Check refrigerant charge and discharge temperature sensor |
| 031 | Incorrect wiring | Inspect all wiring connectors for loose or damaged connections |
| S05 | Incorrect wiring or wiring fault | Check wiring between indoor and outdoor units, correct faults |
| 206 | Power supply voltage abnormal | Check AC input voltage is within rated specification |
| 307 | Electronic Expansion Valve (EEV) lock or open fault | Inspect EEV coil and wiring for a stuck valve |
| 091 | Fan motor failure | Check fan motor, motor wiring, and connector |

For Out of Warranty Hitachi AC Repair in Kolkata, Book Our Service - No Advance Charges
How to read Hitachi AC error codes?
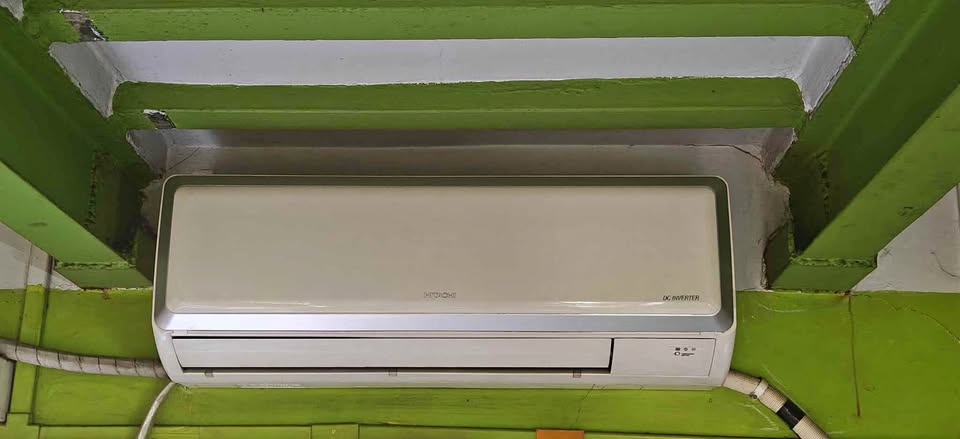
Hitachi indoor units show faults as a series of LED blinks that repeat in a cycle. Outdoor units use a separate blink-count system on the outdoor PCB LED. Reading the pattern correctly is the first step in any Hitachi AC troubleshooting process.
Follow these steps to count the blinks correctly:
- Note whether the blinking light is on the indoor unit or the outdoor unit.
- Count the number of blinks before the pattern pauses or repeats.
- Wait for the full cycle to repeat once to confirm your count.
- Match the blink count to the error code table in this guide.
- On wired remote or newer models, check for a P-series or alphanumeric code, such as P06 or S05, instead of counting blinks.
If you are not confident anough for fixing the Hitachi AC errors by yourself, immidiately contact Urban Service Plaza, the best Hitachi AC service centre in Kolkata & nearby areas for out of warranty AC. No advance booking charges & 15 days service guarantee.
Detailed troubleshooting for Hitachi AC error codes
Indoor unit LED blinking errors
ONCE — Air purifier operation reset stop
- Possible Causes: Normal stop, not a malfunction. This occurs during indoor unit air purifier operation, until the compressor starts.
- What to Do: No repair needed. This is a normal part of startup sequencing, not an error.
1 Blink — Refrigeration cycle or gas problem
- Possible Causes: Low refrigerant due to gas leakage; refrigeration cycle malfunction; resulting poor cooling performance.
- What to Do: Check refrigerant charge and look for leaks. Inspect indoor and outdoor heat exchangers and the refrigeration circuit. A certified technician must recharge refrigerant if a leak is found.
For sameday and affordable AC gas filling service in Kolkata, call Urban Service Plaza at 9831015086
2 Blinks — Peak current protection
- Possible Causes: Compressor drawing excessive current; electrical overload.
- What to Do: Check compressor current and compressor winding. Inspect the outdoor PCB. A technician should replace the PCB or compressor if faulty.
3 Blinks — Indoor-outdoor communication error
- Possible Causes: Communication wire disconnected; loose connector; damaged communication cable; indoor or outdoor PCB fault.
- What to Do: Check communication wiring continuity and connector terminals. Inspect indoor and outdoor PCBs. A technician should repair or replace damaged wiring or PCBs.
4 Blinks — Compressor or switching circuit failure
- Possible Causes: Fault in the compressor or in the switching circuit that drives it.
- What to Do: Check the compressor, inverter module, and power PCB. A technician must handle any compressor or inverter module replacement.
5 Blinks — Room temperature sensor fault
- Possible Causes: Sensor open circuit; sensor short circuit; loose connector; broken wiring.
- What to Do: Check sensor resistance and the wiring harness. Inspect the sensor connector. Replace the sensor if it tests defective.
6 Blinks — Compressor overheating
- Possible Causes: Refrigerant leakage; closed service valve; dirty condenser; restricted airflow; outdoor PCB fault.
- What to Do: Check refrigerant charge and service valves. Clean the condenser and clear airflow blockages. A technician must recharge refrigerant or repair the PCB.
7 Blinks — Indoor coil sensor fault
- Possible Causes: Open or shorted thermistor; loose connector; broken wire.
- What to Do: Check the coil sensor, wiring, and connector. Replace the thermistor if it tests faulty. This replacement should be done by a technician.
8 Blinks — Not documented
- Possible Causes: Not mentioned in the available Hitachi service documentation.
- What to Do: Contact a qualified Hitachi AC technician to confirm the meaning and fix for this code on your specific model.
9 Blinks — Outdoor fan or thermistor fault
- Possible Causes: Fan motor failure; loose connector; sensor fault. This code can vary by model.
- What to Do: Check the fan motor, motor wiring, and thermistor. Inspect the outdoor PCB. A technician should replace the fan motor or sensor if defective.
10 Blinks — Communication or power supply fault
- Possible Causes: Communication fault or power supply issue. This code is model dependent.
- What to Do: Check AC supply voltage, communication wiring, and the outdoor PCB. A technician should verify voltage is within the rated range.
11 Blinks — Outdoor fan stopped by reverse wind
- Possible Causes: Strong reverse wind has stopped the outdoor fan.
- What to Do: No repair needed. The unit will restart automatically once the wind becomes weaker.
12 Blinks — Outdoor DC fan motor lock
- Possible Causes: Fan blade obstruction; fan motor seized; fan motor feedback missing; outdoor controller fault. This code can also indicate a communication failure, depending on the model.
- What to Do: Remove any obstruction around the fan. Check the fan motor and fan controller. A technician should inspect the outdoor PCB if the fault persists.
13 Blinks — EEPROM or outdoor PCB memory error
- Possible Causes: Corrupted EEPROM; PCB software failure.
- What to Do: This fault requires replacing the outdoor PCB. This is a technician-only repair.
14 Blinks — DC bus voltage abnormal
- Possible Causes: Compressor overload; abnormal DC voltage; outdoor PCB failure.
- What to Do: Check the power supply and compressor. A technician should replace the outdoor PCB if the voltage fault continues.
- Call our expert technician for inhouse AC PCB repair for inverter and non-inverter AC units.
15 Blinks — Outdoor controller or circuit defective
- Possible Causes: Fault in the outdoor controller or outdoor circuit. Note that some models do not use this code.
- What to Do: Inspect the outdoor controller. A technician should replace the outdoor PCB if necessary.
16 Blinks — High load stop
- Possible Causes: Closed service valve; blocked outdoor airflow; dirty indoor filter; outdoor fan problem.
- What to Do: Clean filters and open service valves. Remove airflow obstructions. Check the outdoor fan motor. If the fault continues, a technician should inspect the controller PCB.
Outdoor PCB LED blink codes
5 Blinks (Outdoor PCB) — Overload protector activated
- Possible Causes: Outdoor PCB overload protector has triggered.
- What to Do: Check compressor load, outdoor PCB, and the cooling system. A technician should inspect the overload protection circuit.
6 Blinks (Outdoor PCB) — High discharge temperature thermistor fault
- Possible Causes: Fault in the discharge temperature thermistor.
- What to Do: Check the discharge temperature sensor, compressor temperature, and refrigerant system. A technician should replace the thermistor if faulty.
12 Blinks (Outdoor PCB) — DC outdoor fan motor failure
- Possible Causes: Failure in the DC outdoor fan motor.
- What to Do: Check the fan motor, fan driver, wiring, and PCB. A technician should replace the fan motor or driver if defective.
13 Blinks (Outdoor PCB) — Software or EEPROM error
- Possible Causes: Software fault or EEPROM error on the outdoor PCB.
- What to Do: Replace the PCB if required. This is a technician-only repair.
15 Blinks (Outdoor PCB) — Outdoor controller failure
- Possible Causes: Fault in the outdoor controller.
- What to Do: Inspect the controller and replace it if defective. A technician should carry out the replacement.
P-Series and alphanumeric error codes
P01 — High inverter current
- Possible Causes: Inverter drawing high current.
- What to Do: Check compressor load and inverter module. A technician should inspect the inverter circuit further.
P02 — High inverter current protection
- Possible Causes: Protection triggered by high inverter current.
- What to Do: Check compressor current draw and the outdoor PCB. A technician should confirm the cause before any part replacement.
P04 — Inverter heat sink or temperature too high
- Possible Causes: Inverter heat sink or inverter temperature has exceeded safe limits.
- What to Do: Clean the condenser and check outdoor airflow and cooling. A technician should inspect the inverter cooling arrangement.
P05 — Discharge gas temperature too high
- Possible Causes: Discharge gas temperature has exceeded the safe limit.
- What to Do: Check refrigerant charge and look for restrictions in the refrigeration circuit. A technician should investigate further if the fault repeats.
P06 — Low-pressure protection
- Possible Causes: System pressure has dropped below the safe operating level.
- What to Do: Check refrigerant level and look for leaks. A technician should recharge refrigerant if a leak is confirmed.
P09 — High-pressure protection
- Possible Causes: System pressure has risen above the safe operating level.
- What to Do: Check the condenser, airflow, and refrigerant pressure. A technician should clean the condenser or adjust refrigerant charge as needed.
P10 — Current control protection
- Possible Causes: Current control circuit protection has activated.
- What to Do: Check compressor current and the outdoor PCB current control circuit. A technician should confirm the fault source.
P11 — Low-pressure abnormal
- Possible Causes: Abnormal low-pressure reading in the system.
- What to Do: Check refrigerant charge and the low-pressure sensor circuit. A technician should test the sensor if the fault continues.
P12 — High-pressure abnormal
- Possible Causes: Abnormal high-pressure reading in the system.
- What to Do: Check condenser airflow and the high-pressure sensor circuit. A technician should test the sensor if the fault continues.
P13 — High-pressure protection
- Possible Causes: High-pressure protection has activated.
- What to Do: Check refrigerant pressure, condenser cleanliness, and outdoor airflow. A technician should inspect further if the issue repeats.
P14 — Compressor overcurrent
- Possible Causes: Compressor drawing current beyond its rated limit.
- What to Do: Check compressor winding resistance and operating current. A technician should test the compressor before any replacement.
P15 — Discharge gas temperature high with low-pressure abnormal
- Possible Causes: Combined fault of high discharge temperature and abnormal low pressure.
- What to Do: Check refrigerant charge and the discharge temperature sensor. A technician should investigate both faults together.
P16 — Discharge gas superheat abnormal
- Possible Causes: Abnormal superheat reading in the discharge gas.
- What to Do: Check refrigerant charge and the discharge temperature sensor. A technician should confirm proper refrigerant charge levels.
031 — Incorrect wiring
- Possible Causes: Wiring has been connected incorrectly.
- What to Do: Inspect all wiring connectors for loose or damaged connections. Correct any miswiring found. A technician should verify wiring against the service diagram.
S05 — Incorrect wiring or wiring fault
- Possible Causes: Fault in wiring between indoor and outdoor units.
- What to Do: Check wiring between indoor and outdoor units and correct any faults found. A technician should confirm proper connections.
206 — Power supply voltage abnormal
- Possible Causes: Power supply voltage is outside the rated specification.
- What to Do: Check that AC input voltage is within the rated specification. A technician should test the power supply if voltage is abnormal.
307 — EEV lock or open fault
- Possible Causes: Electronic Expansion Valve (EEV) is stuck locked or open.
- What to Do: Inspect the EEV coil and wiring for a stuck or jammed valve. A technician should replace the EEV if it is faulty.
091 — Fan motor failure
- Possible Causes: Failure in the fan motor.
- What to Do: Check the fan motor, motor wiring, and connector. A technician should replace the fan motor if it tests faulty.
When to call a professional technician?

Some Hitachi AC errors go beyond simple home fixes. Refrigerant leaks, PCB failures, compressor faults, and EEPROM errors need certified tools and trained hands. Trying to fix these yourself can worsen the damage or void your warranty.
Call a technician if you notice:
If you are in Kolkata, Urban Service Plaza offers doorstep AC repair for these exact issues. The company is ISO 9001:2015 certified and serves customers across Kolkata with trained technicians. You can reach them at 9831015086, Monday to Saturday, 10 AM to 7 PM.
Final Thought
Hitachi AC error codes, whether shown as blink patterns or P-series codes, point to a specific problem inside the unit. Reading them correctly is the first step toward a fast, accurate fix. Simple checks like cleaning filters, resetting the power, and checking service valves are safe to try on your own.
However, issues with sensors, PCBs, compressors, or refrigerants need a certified technician. Always note the error code before you reset the unit. Do not delay calling a professional if the error repeats or if you notice unusual smells or sounds. For doorstep AC repair in Kolkata, Urban Service Plaza is ready to help you get your Hitachi AC running smoothly again.


